“I’ll be there in six minutes. Seven if there’s resistance. Eight, if the resistance is carrying bolters.”
Unknown Legionary Captain
Legiones Astartes Sons of Horus
The Armies
For this mission, all Commanders should compose an Engagement Force from their Battle Company’s Regimental Registry, adding any additional Conscripts to their armies from the list of approved Horus Heresy publications provided by the Event Organizer (EO). The total points cost of the Engagement Force should not exceed 1,500 Points.
The Battlefield
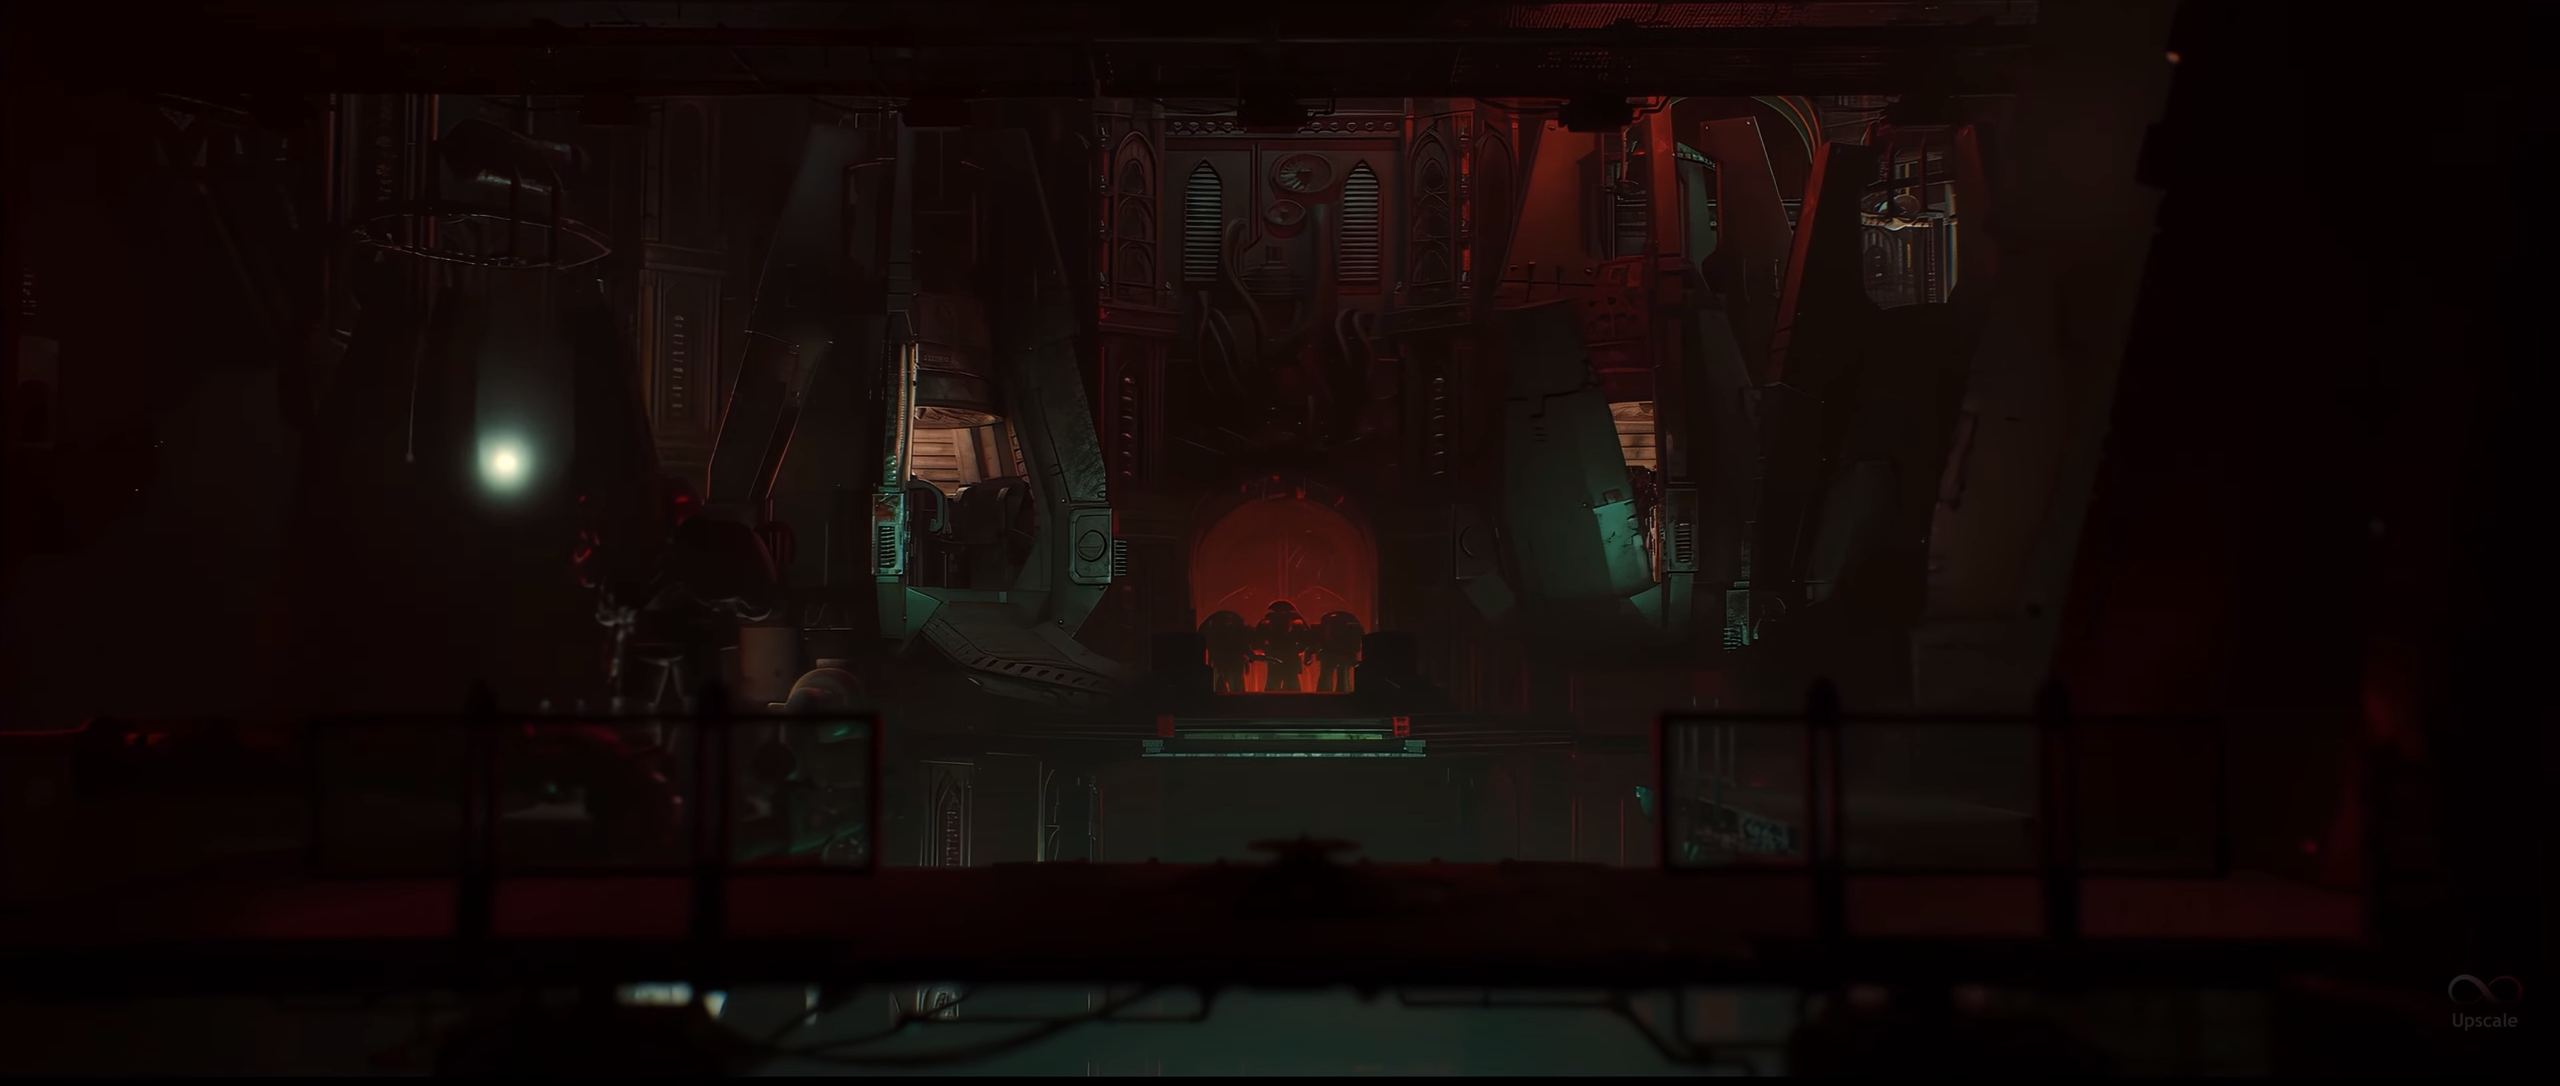
The playable area is defined as a 4’ x 4’ square area, or a total of 16 square feet in a custom orientation. The interior of the vessel is a tangled labyrinth of passageways and chambers, and should be represented appropriately. If you are using Game Workshop’s Zone Mortalis Complex terrain boards, then they may be laid out in an agreed fashion or, alternatively, the players may take turns placing tiles and walls so that they take up the playing area, making sure that each table edge has at least one clear entry/exit point per player.
Deployment (Ship Wrecker)
Before the game begins, both sides should divide their forces into two roughly equal forces based on their number of units.
They must then decide which of these two forces is to be their spearhead and which of these two forces is to be their reserve. This arrangement represents the spearhead of an attacking force working its way through the vessel, and the defenders rallying to meet them.
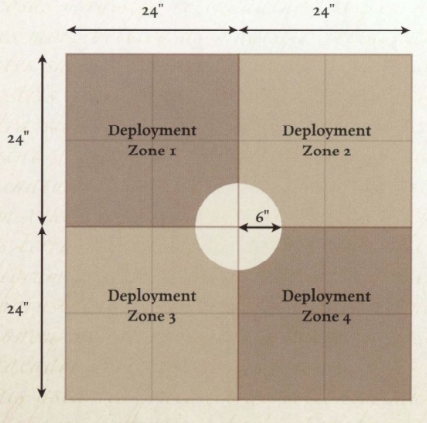
The gaming table is then divided into quarters, and both players roll off to choose a deployment zone. The winner then picks which is to be their deployment zone and deploys their spearhead force anywhere in this area, but not within 6” of the centre of the board.
The other player then rolls a D6. On a roll of a 4+, they may choose any of the three remaining areas in which to deploy their spearhead, otherwise they must deploy their spearhead in the deployment zone on the opposite table edge to that chosen by their opponent.
When the Attacking side’s reserves become available, they enter play from the Attacker’s table edge. The Defending side’s reserves arrive from any other table edge.
Special Rules
Zone Mortalis, Reserves, Tactically Secured, Superstructure Failure
Tactically Secured
In this Zone Mortalis Boarding Assault mission, units drawn from either the Troops or Elites allowance count as scoring units where this is called for by the mission. A unit may only ever claim one Objective at a time.
Superstructure Failure
After the first Mission Goal has been destroyed (if possible), the Catastrophic Damage special rule goes into effect. For each Goal Objective destroyed in the current game, increase each roll on the Catastrophic Damage table by 1.
First Turn
The Attacker has the first turn; their opponent, the Defender, may attempt to Seize the Initiative.
Game Length
After five turns, roll a D6. On a 4+, a sixth and final turn is played.
“Wipe Out!”: Regardless of any other condition, if at the end of the game your enemy has no units left on the table then you are victorious!
Victory Conditions
The Wrecking Mission represents an attack on one of several vital target areas, ranging from the warship’s massive plasma drives to its command deck. The larger the ship, the more of these systems the attackers have to cripple in order to bring about the death or capture of the vessel. At the end of the game, the Commander who has scored the most Victory Points has won the engagement. If the Commanders have the same number of Victory Points, the game ends in a draw.
Primary Objectives
Before the game begins, determine the Mission Goal. If a series of games are being fought as described previously, the goal will be determined already, but if the game is being played as a one-off, the players can either agree between them which Mission Goal is being used, or roll on the following chart. This goal constitutes the mission’s primary objective and determines its victory conditions.
Secondary Objectives
- Slay the Warlord (Except when the Goal is “Ship’s Bridge”)
- First Blood
Mission Debriefs: After you finish playing the above mission, ensure that one of the Commanders logs it in our system via the following Google form: https://forms.gle/gFNQJEq2UKnNqBV58.
Mission Goal: Drives
A warship’s drives are a prime target for any boarding assault mission, the attackers seeking to cripple the enemy vessel beyond any hope of escape.
The Attacker’s goal is to destroy a number of vital drive components and thus bring the warship’s mighty engines to a shuddering halt. The Defender identifies D3+2 Zone Mortalis board sections, and within each places a single objective marker representing a vital command terminal, plasma valve or power conduit. These markers should be placed as close to the centre of the board section, or one of its sub-chambers if appropriate, as possible. They may not be placed in impassable terrain or in such a way as to block a corridor or access point.
Cascade Failure: When an objective marker is destroyed, roll a D6. On a 6, it explodes with the same effect as rolling a 6 on the Vehicle Damage table. Furthermore, roll a D6 for the next closest objective marker. On a 6, that objective marker explodes too. Keep rolling for each objective marker in this way, until one does not explode or no more remain.
Primary Objective
At the end of the game, the Attackers gain 1 Victory point for each objective destroyed, and the Defenders gain 1 Victory point for each objective still on the table. The side with the most Victory points is the victor.
Mission Goal: Augur Arrays
Without its myriad banks of auspexes, a warship is utterly helpless and likely to fall prey to any of a million different hazards, from solar flares to enemy attack. The central nodes of this massive network are high priority targets for boarders.
The Attacker’s goal is to destroy a viral terminal bank used to relay critical sensor data to the bridge and other parts of the warship. The Defender identifies D3+2 arched wall sections on a single Zone Mortalis board section - these are the objectives and represent sensor command stations, bulkhead-mounted pier-slates and other similar systems.
Augur Ex-load: Infantry units with at least one model in contact with an objective have the Night Vision, Sniper and Split Fire special rules, so long as no enemy models are in contact with the same objective. Note that a unit may only count as being in contact with a single sensor bank at a time, and so the player should declare which is in use if the unit is touching more than one.
Primary Objective
At the end of the game, the Attackers gain 1 Victory point for each objective destroyed, and the Defenders gain I Victory point for each objective still on the table. The side with the most Victory points is the winner.
Mission Goal: Weapons Batteries
Even crippled and blinded, a warship might inflict enormous damage on any enemy vessel that draws too close. By silencing the vessel’s mighty broadside batteries, the attackers’ own ships may close to surround their quarry.
The Attacker’s goal is to sabotage a vital component of the vessel’s central arming mechanism so that the tank-sized macroshells Ii.red by the broadside batteries cannot be transferred from the ship’s magazines to the turrets. The Defender identifies a single Zone Mortalis board section and on this indicates a square consisting of four deck plates (a total area of 4” x 4”). This square represents an ammunition lift platform, and is the Attacker’s objective for this mission.
Explosive Cargo: Should the ammunition platform be destroyed, an additional D6 is rolled for all subsequent rolls on the Catastrophic Damage - Blood in the Void table, the lowest of the three results being ignored.
Primary Objective
At the end of the game, the Attackers win if the objective has been destroyed, and the Defenders win if the objective has not been destroyed.
Mission Goal: Life Sustainers
Through a drastic tactic that will inevitably preclude the capturing of the target vessel intact, an attacker who wishes simply to destroy it no matter the cost might attempt to render a vessel’s chambers and companionways inhospitable to all but the most hardy of combatants.
The Attacker’s goal is 10 wreck viral components in d1e warship’s environmental systems. The Defender places D6+2 objective markers on the table. These markers represent gas conduits, pressure seals and rad-sinks, without which the area will soon become inhospitable. The markers may be placed anywhere on the table other than within 6” of a table edge or 12” of another marker. They also may be placed in impassable terrain.
Containment Failure: When an objective is destroyed, place a flamer (tear-drop shaped) template with the narrow end in contact with it and determine the template’s alignment by rolling a Scatter dice. Roll a D6 for the attack’s Strength and another D6 for its AP value. All units under the template take hits and damage as if hit by a template weapon attack.
Primary Objective
At the end of the game, the Attackers gain 1 Victory point for each objective destroyed, and the Defenders gain 1 Victory point for each objective still on the table. The side with the most Victory points is the winner.
Mission Goal: Ship’s Bridge
The ultimate prize of any boarding action is command of the vessel itself, a feat that may only be achieved by the storm mg of the command deck. The bridge is often the scene of the bloody climax of a boarding action as the captain and the senior officers sell their lives dearly in the final defiance of the vessel.
The Attacker’s goal is to kill the Defender’s Warlord, who for the purposes and duration of the boarding action is considered to be the vessel’s master and commander. The Defending player identifies a single Zone Mortalis board section as the command deck, and at the centre of this places a piece of terrain to represent the captain’s command throne (if no such piece is available, simply indicate a 2” x 2” section of decking).
Command Throne: While the Defenders side’s Warlord is on or in base contact with the command throne, that model has the Fearless and Counter-attack special rules, as do all friendly models on the command deck section of the Zone Mortalis board.
Primary Objective
At the end of the game, if the Defenders side’s Warlord has been slain, the Attacker earns D6 Victory points. If the Warlord is not slain, the Defender earns D6 Victory points. In addition, each side earns an additional Victory point for each of its scoring units entirely within the command deck board section and not falling back. The side with the most Victory points is the winner.